
Google’s Chrome Autofill is a great tool for saving time here and there. This built-in browser feature helps you automatically fill in passwords, payment and contact details, and addresses. But is it really the best tool for autofilling? Perhaps not.
Find out more about how to use Chrome Autofill to save you time, how to adjust the settings so it only fills out information you want it to fill out, and the best free alternative that comes with more features and controls to improve your workflow.
What is Chrome Autofill?
As the name gives away, Chrome Autofill is a built-in feature of Google Chrome that helps you autofill web forms. If you’re using Google Chrome, chances are you might’ve even already used this feature without even knowing it!
How do I turn on autofill in Chrome?
It’s pretty easy: Chrome users can access it by selecting the three dots in the top right corner, then going to Settings > Autofill. This is an easy way to adjust what information gets stored for your passwords, payment methods, addresses, and more.

How do I find autofill in Chrome on iOS or Android devices?
You can access Chrome Autofill in pretty much the same way, whether you’re using the Chrome app for iOS or Android devices. Just tap the three dots on your Chrome app and select “Settings.” Then, select “Addresses and more.” This will give you access to autofill for saving and filling addresses.
Chrome’s autofill settings include auto-filling for passwords, payment methods, and addresses. And a really great question to ask here is:
“Should I be storing sensitive information like my credit card details to begin with?”
Our advice? No! You shouldn’t. We advise our Magicians (the people who use Magical 😉) not to store sensitive data like credit card or social security numbers—even though our security protocols are rigid. If someone gains access to your computer (whether you use Chrome Autofill or another tool) they’d be able to use your shortcuts to bring up stuff you don’t want them to see.
So, excluding your payment details, the Chrome Autofill settings are really only helpful for filling in personal details and your addresses.
How do I change my Google Chrome Autofill settings?
If you’d like to change up the settings on Google Chrome Autofill, all you need to do is click into any one of the settings pages outlined above. For example, on the “Passwords” page you can set whether you want the browser to offer to save passwords, auto-sign into sites where you’ve stored your credentials, and add or remove individual sites from your list of saved passwords.
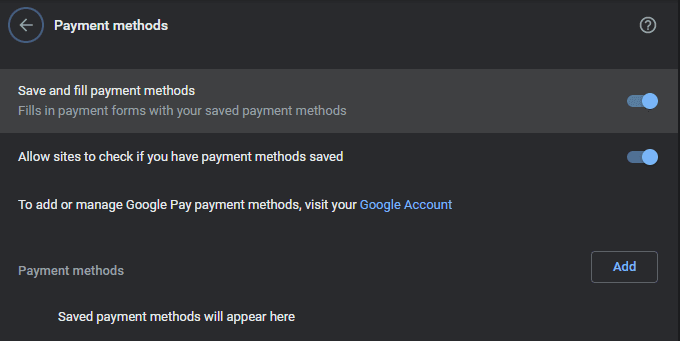
To check and disable Chrome Autofill’s payment detail settings, just click the “Payment methods” option and move the sliders to the left.
Magical: the best alternative to Chrome Autofill

So, Chrome autofill only lets you autofill specific limited details. But there’s a free Google Chrome extension that’s much more robust—and it’ll help you improve your workflows and autofill information anywhere on the web.
Introducing: Magical. Here are three reasons why people at companies like Disney, Facebook, Uber, and Salesforce use Magical for text expansion and autofill. 🪄
1. You own your autofilling
Chrome Autofill settings restrict you to existing fields—including passwords, addresses, and payment details. But what if you want (or need) to do more? For example, what if you find yourself regularly filling in your job title?
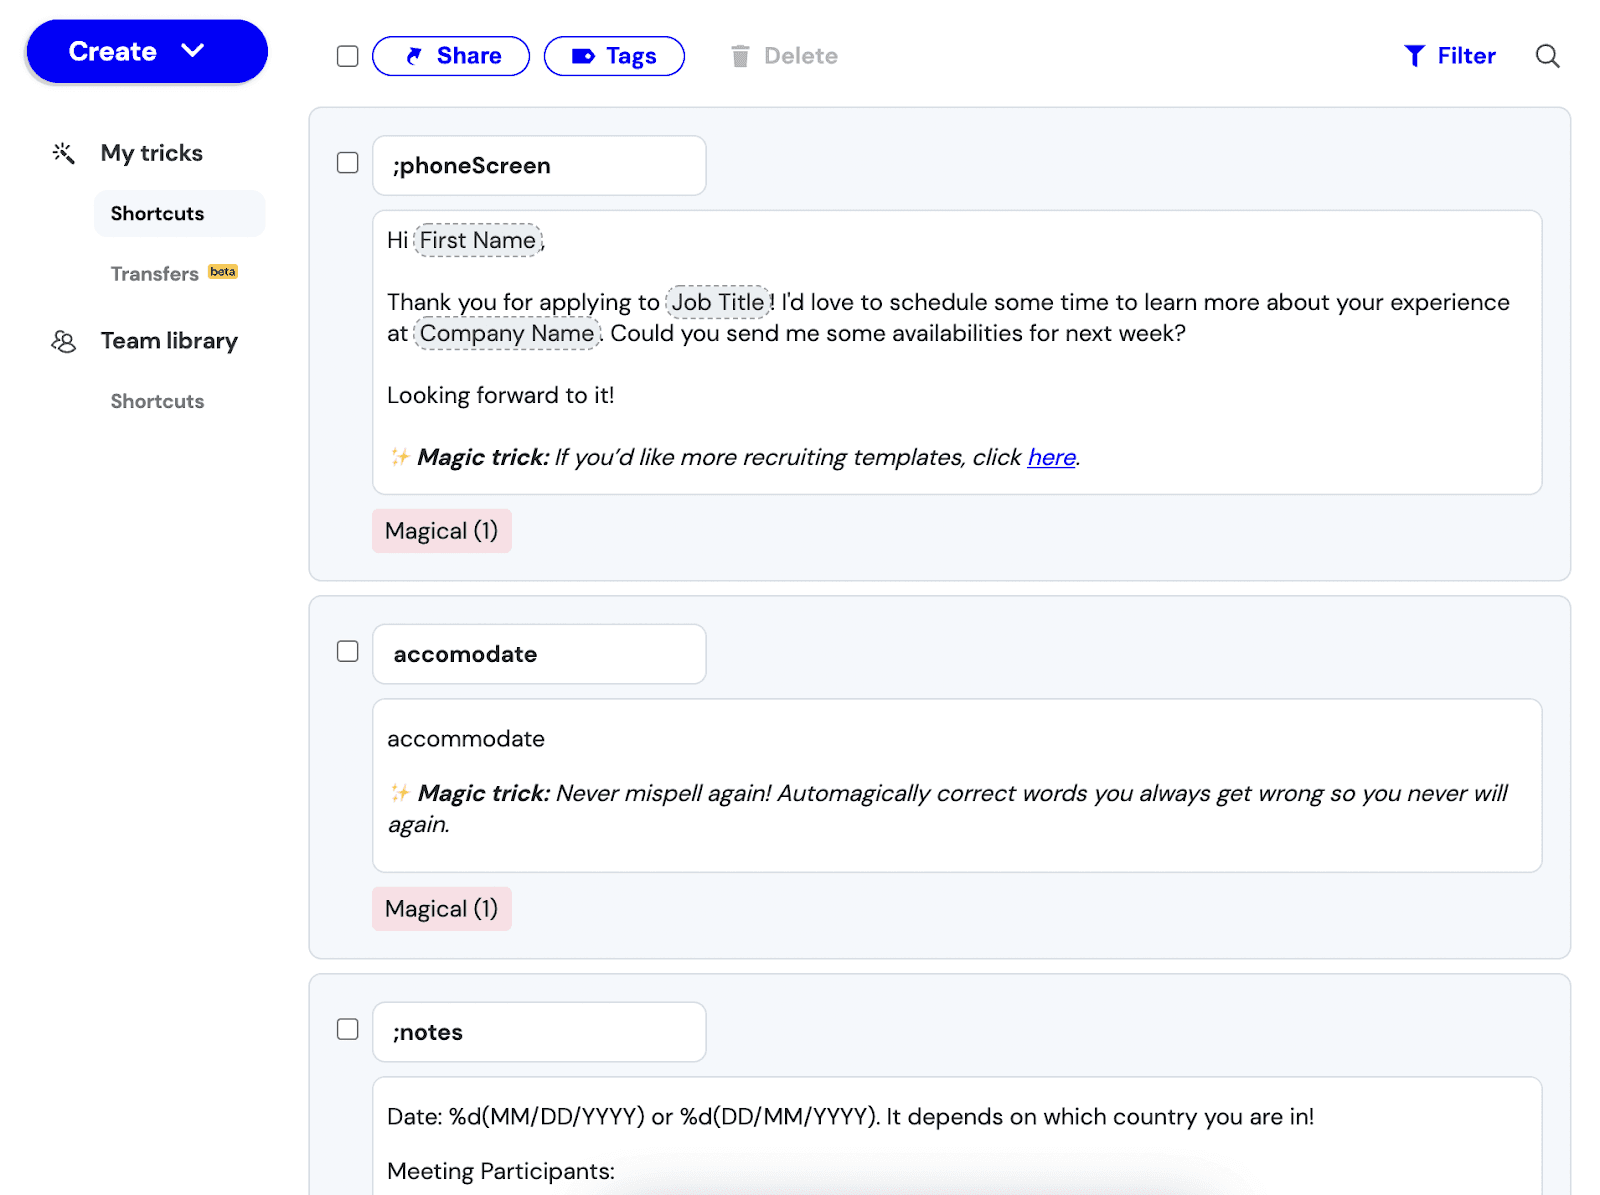
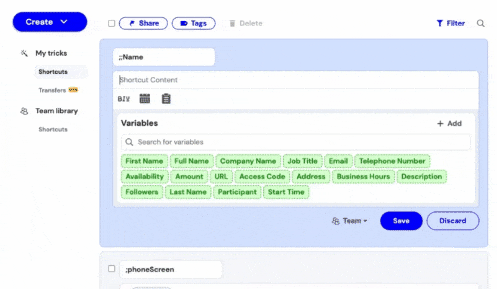
Magical allows you to do much more than Chrome Autofill here. The free Chrome extension lets you create customized text shortcuts—any phrase you find yourself typing regularly. Your shortcuts are all stored in your own secure library:
You just need to type double slashes “//” to summon your autofill. 🪄 And, of course, you can also store all the same info that you would with the native Chrome autofill. Although remember: we still recommend not storing your most sensitive information!
Here’s an example of how Spiderman might store his full name:
Peter won’t ever need to type out his full name in a form again. 🕸️
2. You can autofill beyond simple forms
Automatically filling web forms that ask for your personal details is one thing, but some of us need to repeatedly fill out all kinds of forms and fields on the web as part of our daily work.
For example, sales teams have to update their customer relationship management (CRM) tools with new customer information, and recruiters need to constantly input up-to-date candidate information into their applicant tracking systems (ATS).
So, what can you do to make this easier?
Chrome Autofill isn’t much help here—but Magical lets you autofill this type of data as well. It doesn’t limit you to adding your own details—you can grab customer information from one place and teleport it to where you need in a flash.
(Wait! Did data entry just become fun? 😁)
If you want to input prospects from LinkedIn into Google Sheets, for example, all you have to do is have both tabs open:

3. You can autofill as a team
If each person on your team deals with similar processes every day—e.g. customer support fielding queries or sales teams conducting cold outreach—a shared library of shortcuts is just what you need. It keeps everyone on the same page, and means the whole team has access to speedy autofill whenever they need it.
With this feature, you can:
Access the same background info
Prevent common typos
Keep brand messaging consistent
All use the most effective content
Your very own Team Library lets you centralize all your most important autofills, so anyone on your team can use them to send out an email or message quickly:

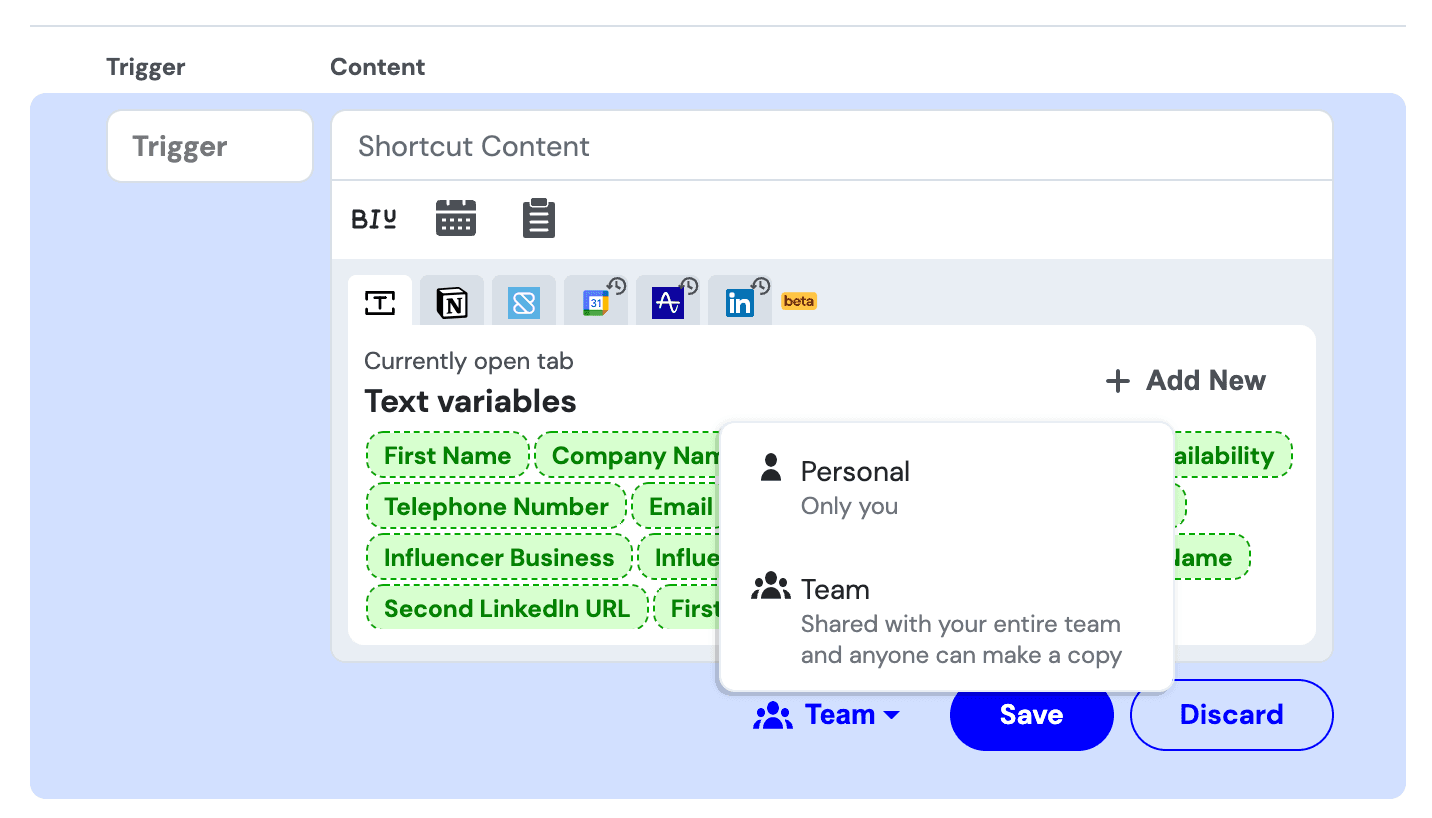
You don’t need to share everything, though. A dropdown menu within the Magical app lets you choose whether to keep your text shortcuts private, or share them with your team:
Start auto filling with magic ✨
Sure, Chrome Autofill helps you save some time here and there. But Magical saves you tons of time. In fact, we’ve already saved our Magicians more than 1,500 years of time. 🤯
It’s really easy to get started. Magical is a no-code solution that’s free to download. No need for any complex integration. It works directly on Chromium-based browsers.